Kolpin 89135 Fuel Pack (EPA/CPSC Compliant) Review

Kolpin 89135 Fuel Pack (EPA/CPSC Compliant) Feature
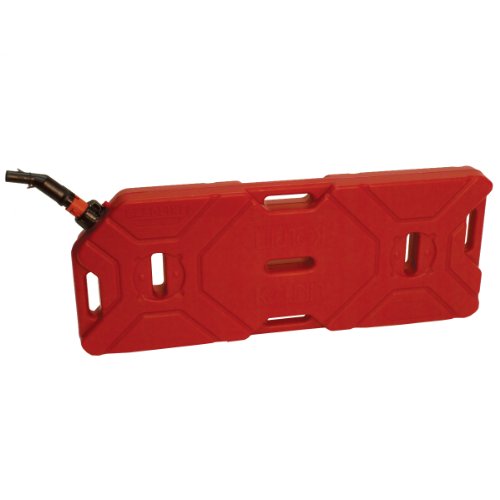
- 4 gal fuel packsecurely mounts flat on any ATV rack with (4) heavy 1" wide Velcro attachments letting you stack additional gear on top or mount the packs upright with the separate purchase of two (#89475) Kolpin ATV Brackets
- Made of puncture resistant, crush proof, high-density polyethylene NanoTechnology ? Kolpin fuel packs are the toughest available
- Design features molded handles for easy transportation and filling as well as self venting - child proof spout for filling and a blind cap for transporting.
- Kolpin fuel and water packs can mount to any flat (drillable) surface with our versatile (89435) Pack Mount
- Carb Compliant: G-09-016, Made in USA
Important Fueling Instructions
Note: It is common for the tank to distort or expand due to fuel pressure caused by direct sunlight or heat. Fuel vapor can only reach a maximum pressure of 6 PSI, and Kolpin tanks are tested to 20 PSI. Before fueling, it is crucial that you first release the pressure in the tank by either loosening the blind cap or compressing the spout while in the upright position. Additionally, ensure that the gasket is fully seated on the flange of the spout. Failure to do either of these will result in unwanted fuel dispensing, which could lead to serious injury.
Step 1: First, rotate the green collar until you hear a click. This will unlock the spout, but won't allow fuel to dispense. You will see the number "1" molded on this section with arrows showing which direction to rotate. This is to remind you the order needed to activate the spout.
Step 2: Now, set the tab of the spout on the edge of your gas tank. Applying downward pressure will open the valve in the spout and allow fuel to dispense. Be sure to not push excessively or twist the spout, as the tab could fail. Here you will see a number "2" molded on this section, to remind you it is the second step to dispensing fuel.
When you are finished fueling your machine, simply release downward pressure and the spout will snap closed and return to the locked position. Allow the remaining fuel in the nozzle to drain, and then you can remount your fuel pack on your vehicle. For storage purposes, reverse the spout, place the dust cover over the opening and store inside the tank--making sure the U-shaped gasket is seated properly on the flange.
Please consult the included instruction sheet for more safety and usage guidelines.

No comments:
Post a Comment